How To Include Billing on Android
Set up your InApp Purchase inside the Google Play Console

Adding a payment system on any platform is a critical step that needs extra care. It often raises several questions :
-
How do I add my products to my application?
-
Can I smoothly test my purchases?
-
How to distinguish Test purchases from Real purchases?
-
Will I be charged while testing my purchase flow?
Although there are different payment systems that you may choose to include in your application, this article is only about the native billing system. Also if you have no technical background, that’s ok 🙂. This article is not about how to develop but rather how to configure your billing.
We assume here that you have already developed your InApp Purchase (IAP) process. If that is not the case, I wrote an Android library that can bootstrap your project with it.
Let’s break it down so that you feel comfortable when shipping your product to the store. Now buckle up and let’s get it done 🤓.
Where it all begins
Since we are using the native payment system, we need to start by logging to your google developer account. You can pilot there your Android application.
Ensure you fill all mandatory fields. It would be right to feel that it looks premature at this step. However, you need a published application to test your IAP.
Configure your merchant account
Once your application ready to be published, go to Store presence > In-app products. You may need to create a merchant account that allows your company to get paid.
Be aware that creating merchant account is available to a limited set of countries. Make sure that your company matches this requirement before going any further or you won’t be able to go any further.
Add your products
With your merchant account configured you can now create the products that you want to propose to your end-users. There are two distinct types of products:
-
Managed products
-
Subscriptions
Subscriptions behave a bit differently than In-app products. For the sake of simplicity, we will focus on “managed products”.
Click on ADD NEW PRODUCT and select a product id.
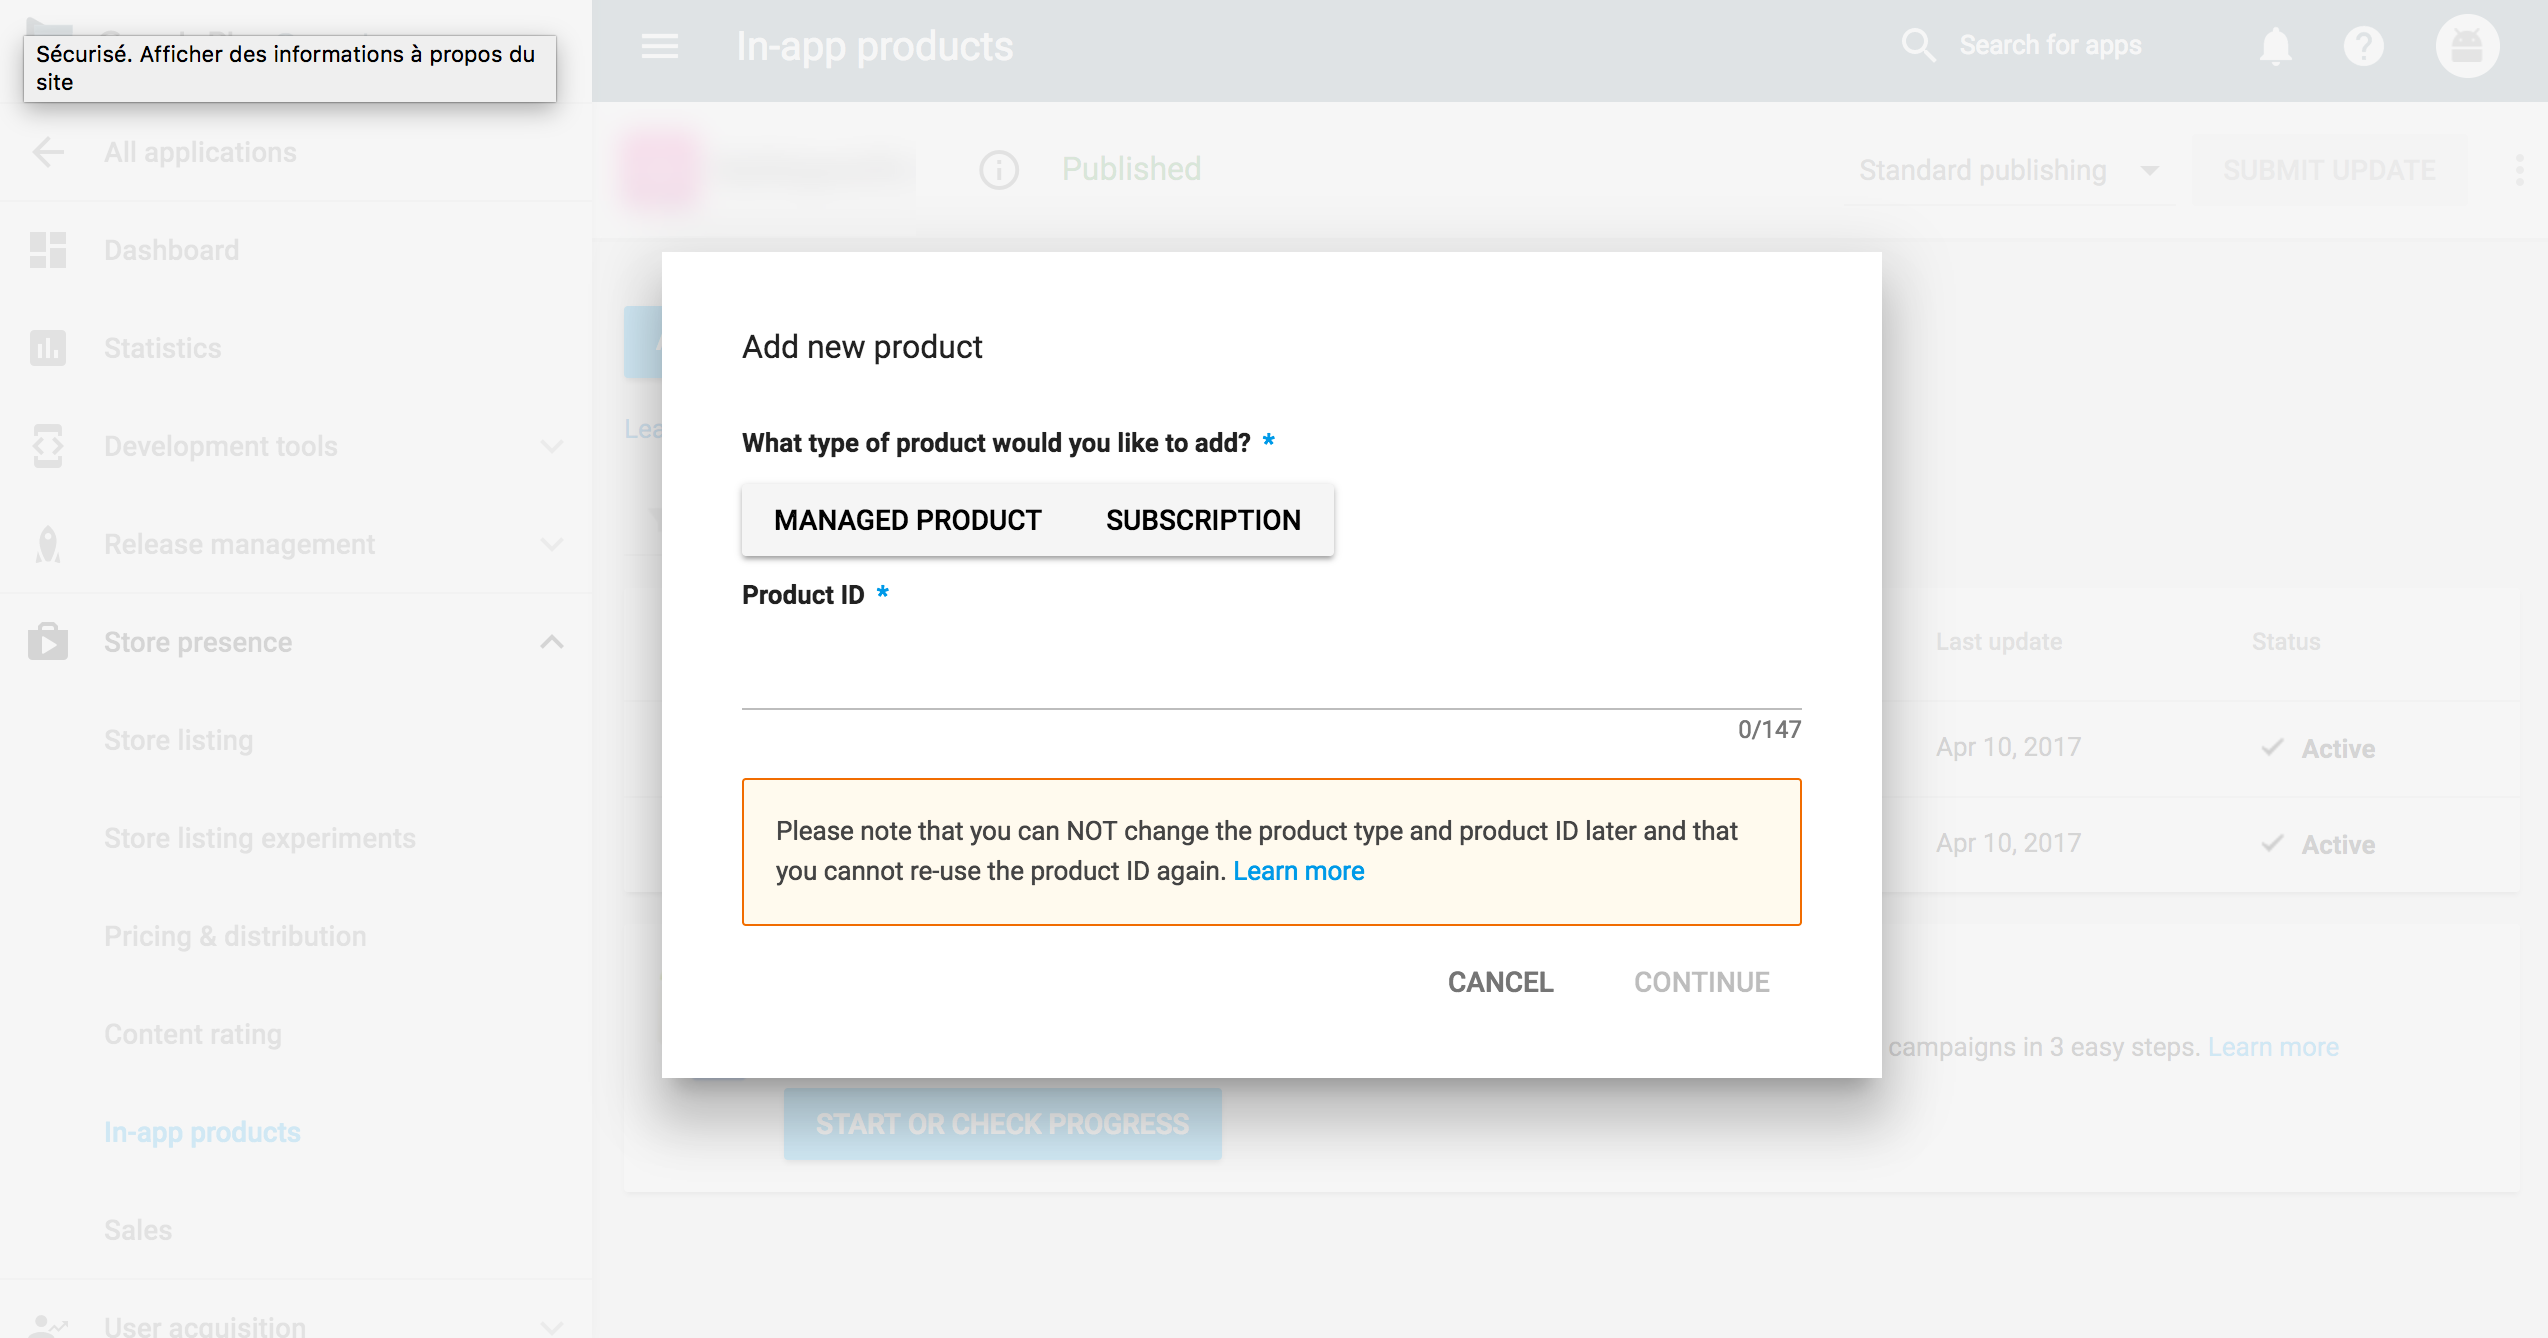
Fill in the title, description, price and finally activate the product
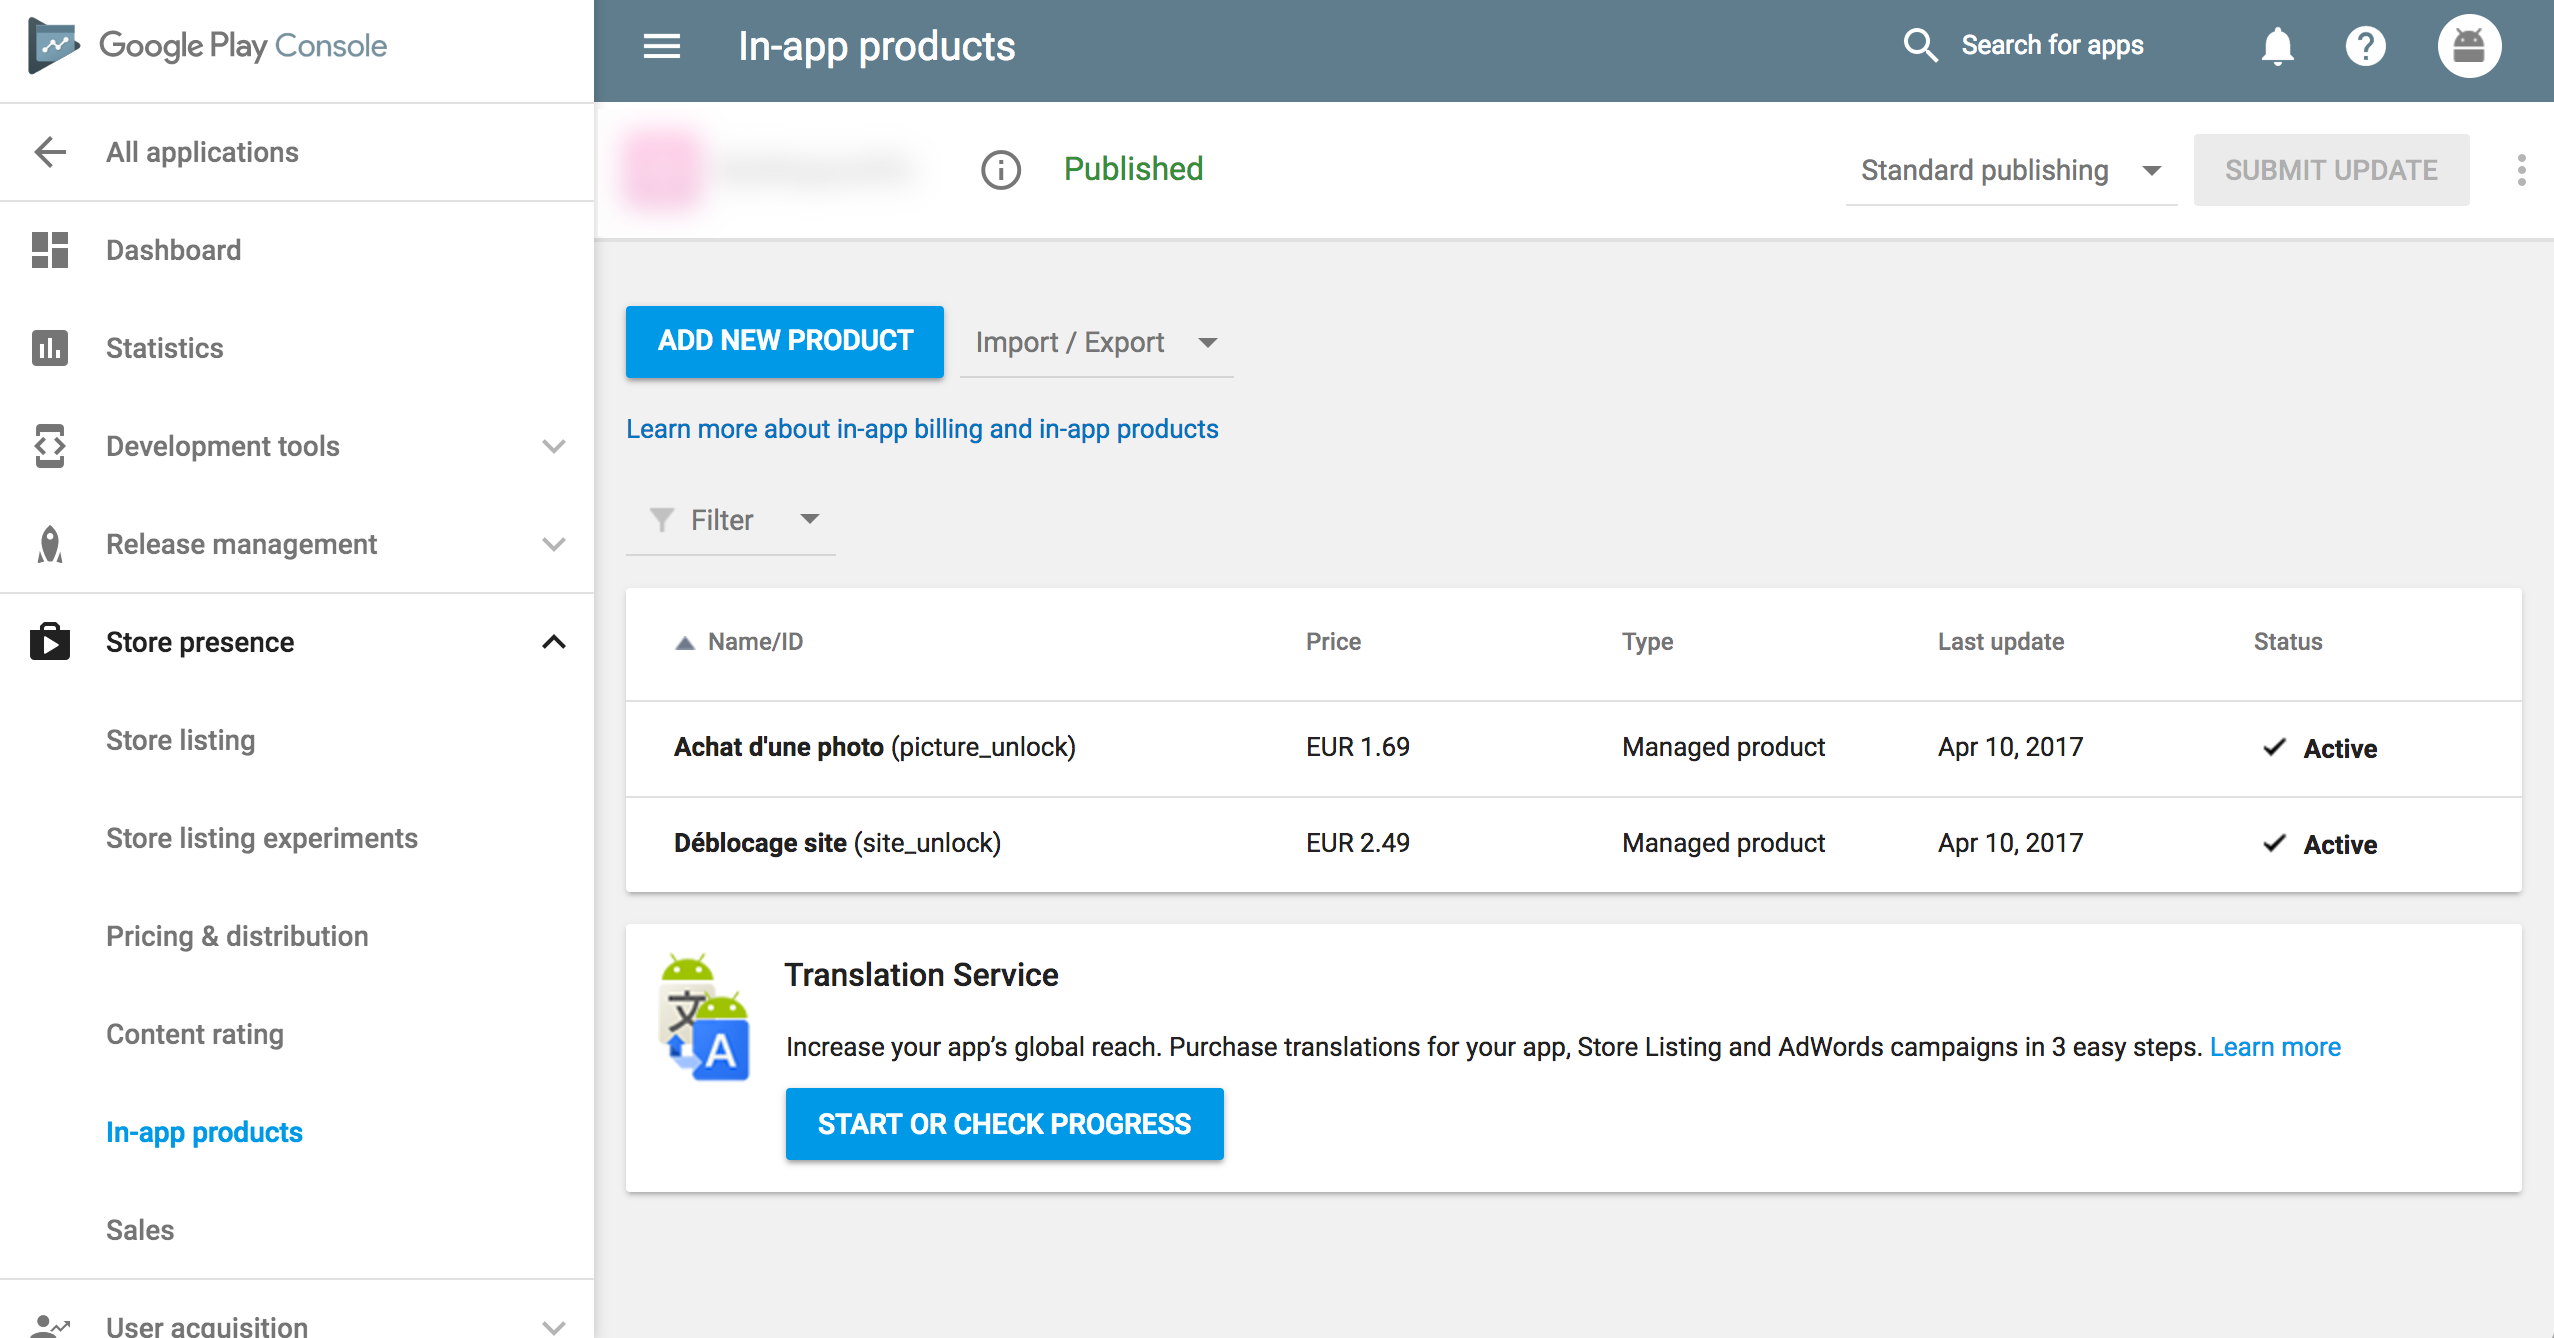
You are now ready to test your IAP flow by fetching your In-app products and attempt payment on them.
Try it out!
Launch your application and see that you can fetch your products! Now try to make a payment. You will end up with this dreadful error dialogue:
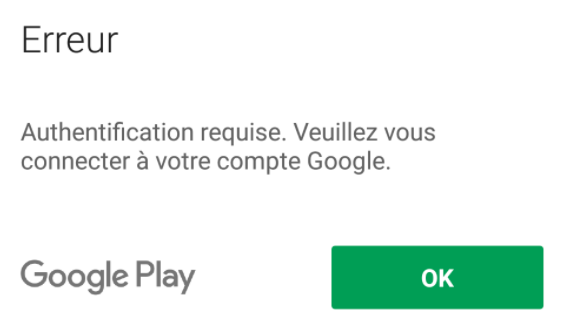
You will need to build a signed APK in release mode and publish it to the PlayStore. You can either use the alpha or Beta channel to keep the publication private to a set of known users. From the Release management panel, on the App releases section :
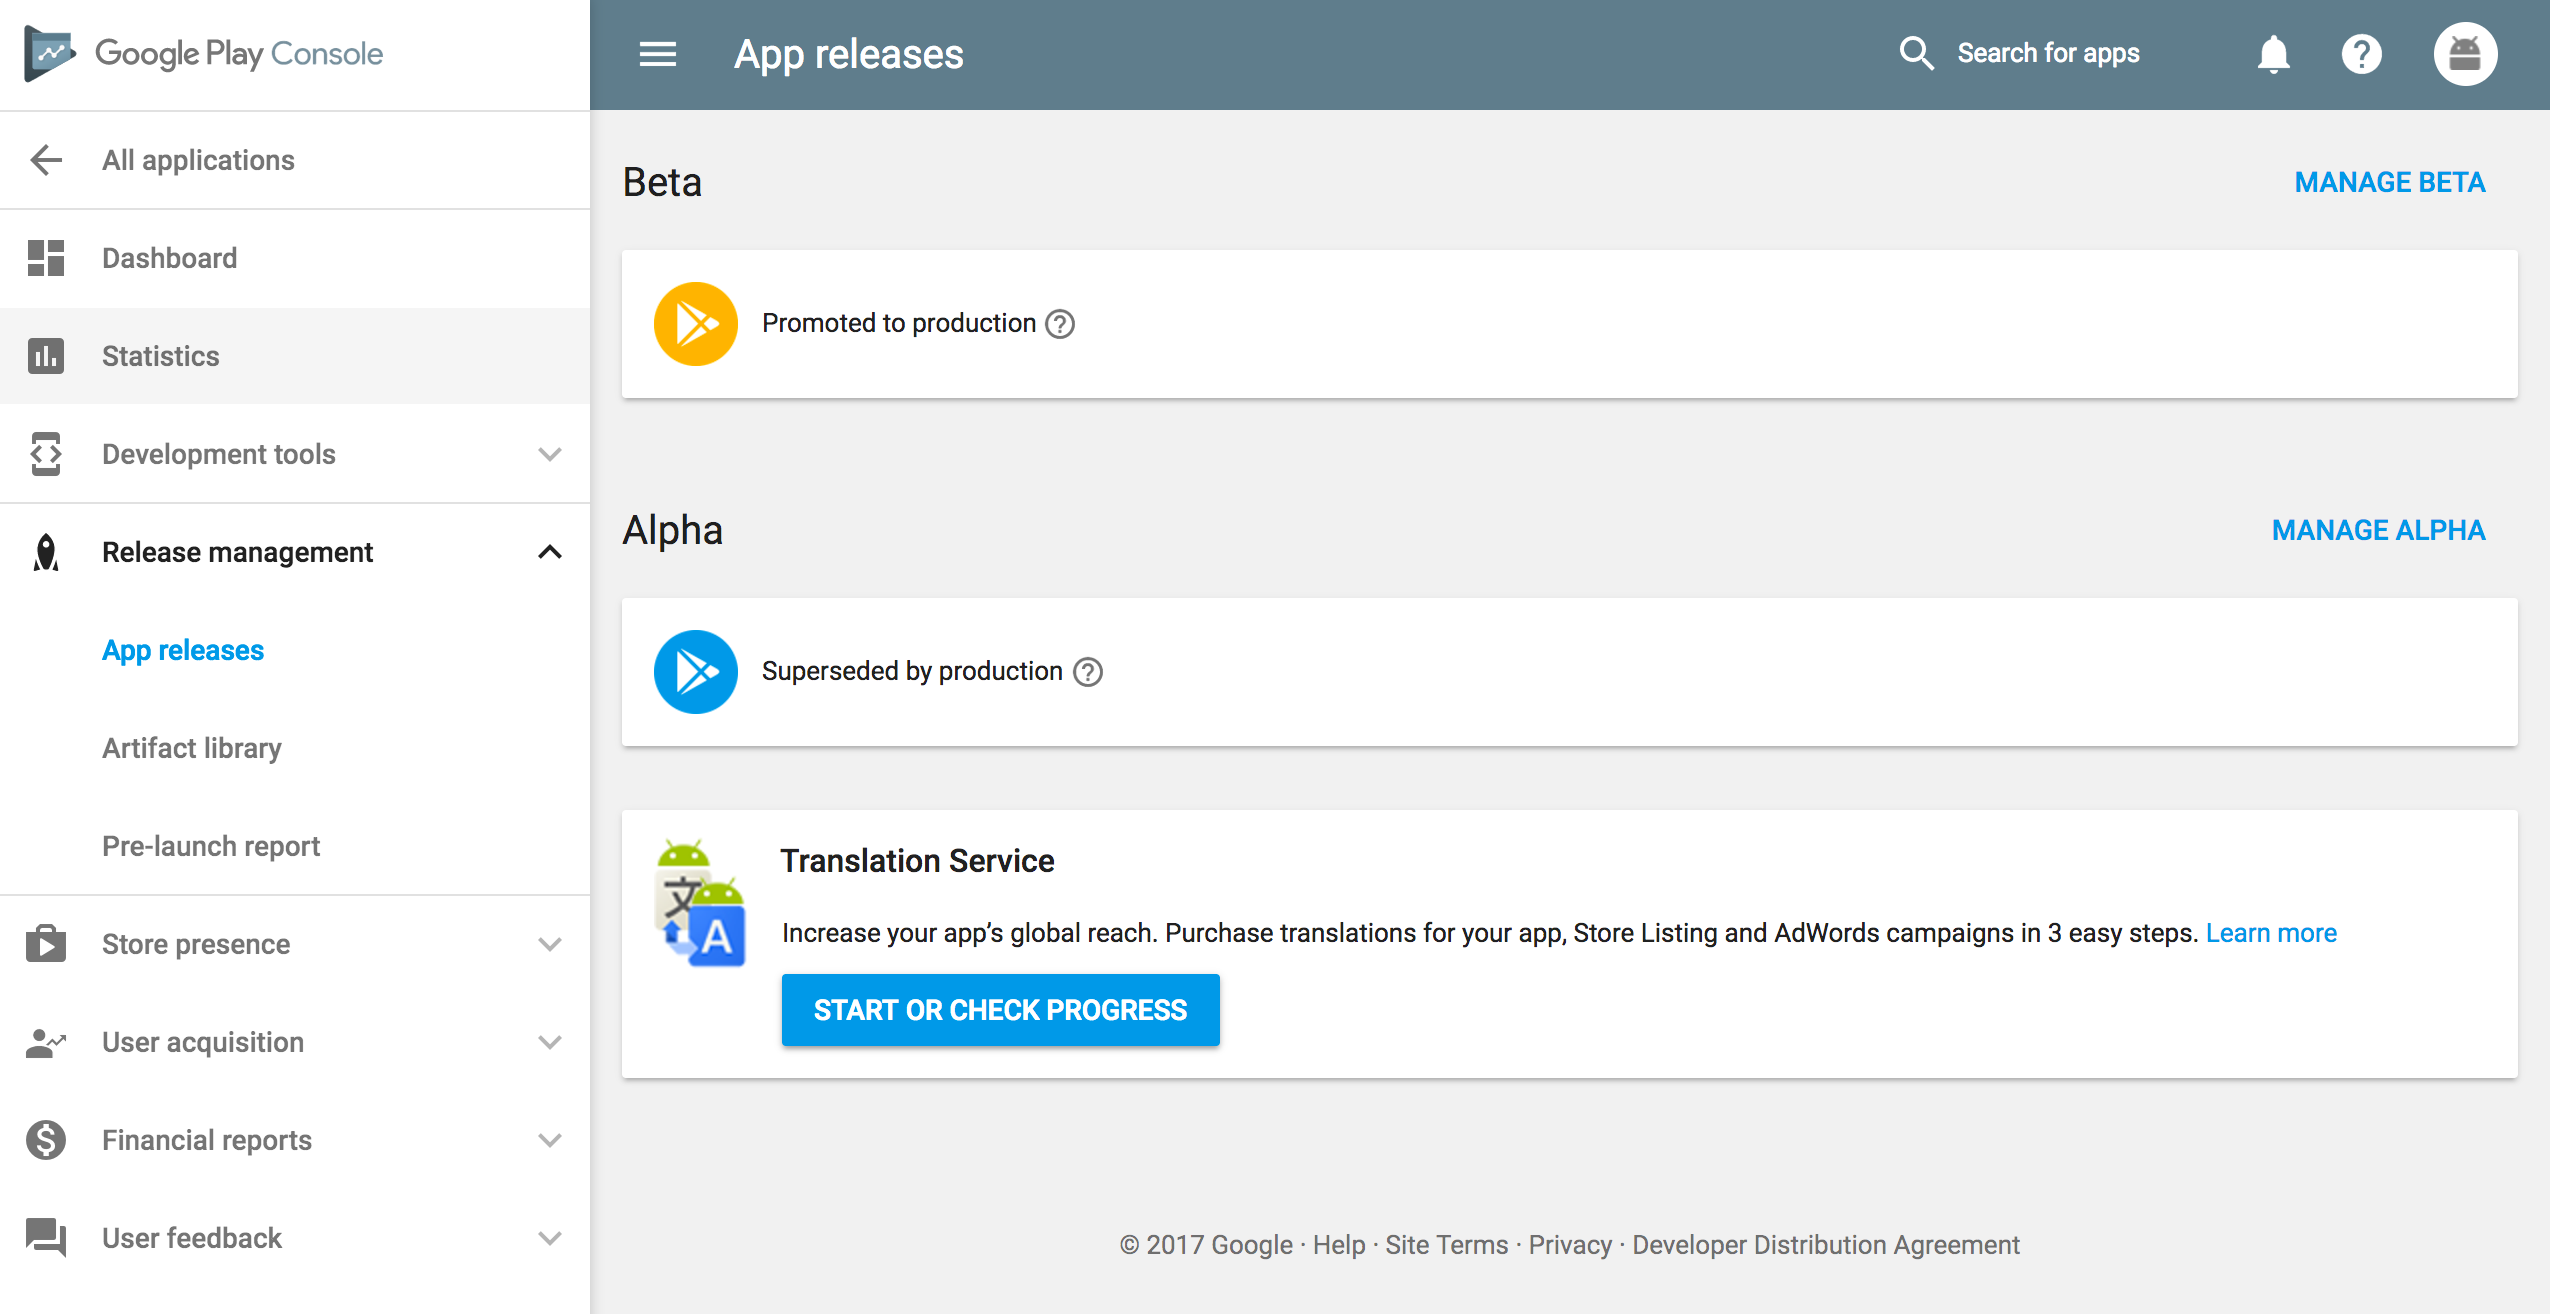
Configure your publication and upload your release artifact. Save it and validate it for review.
The review can take up to a few hours before your application will be published on the PlayStore. Be patient ;)
Remember to manage your Beta-tester list that will be able to download the application once published. Go to Settings > Manage testers :
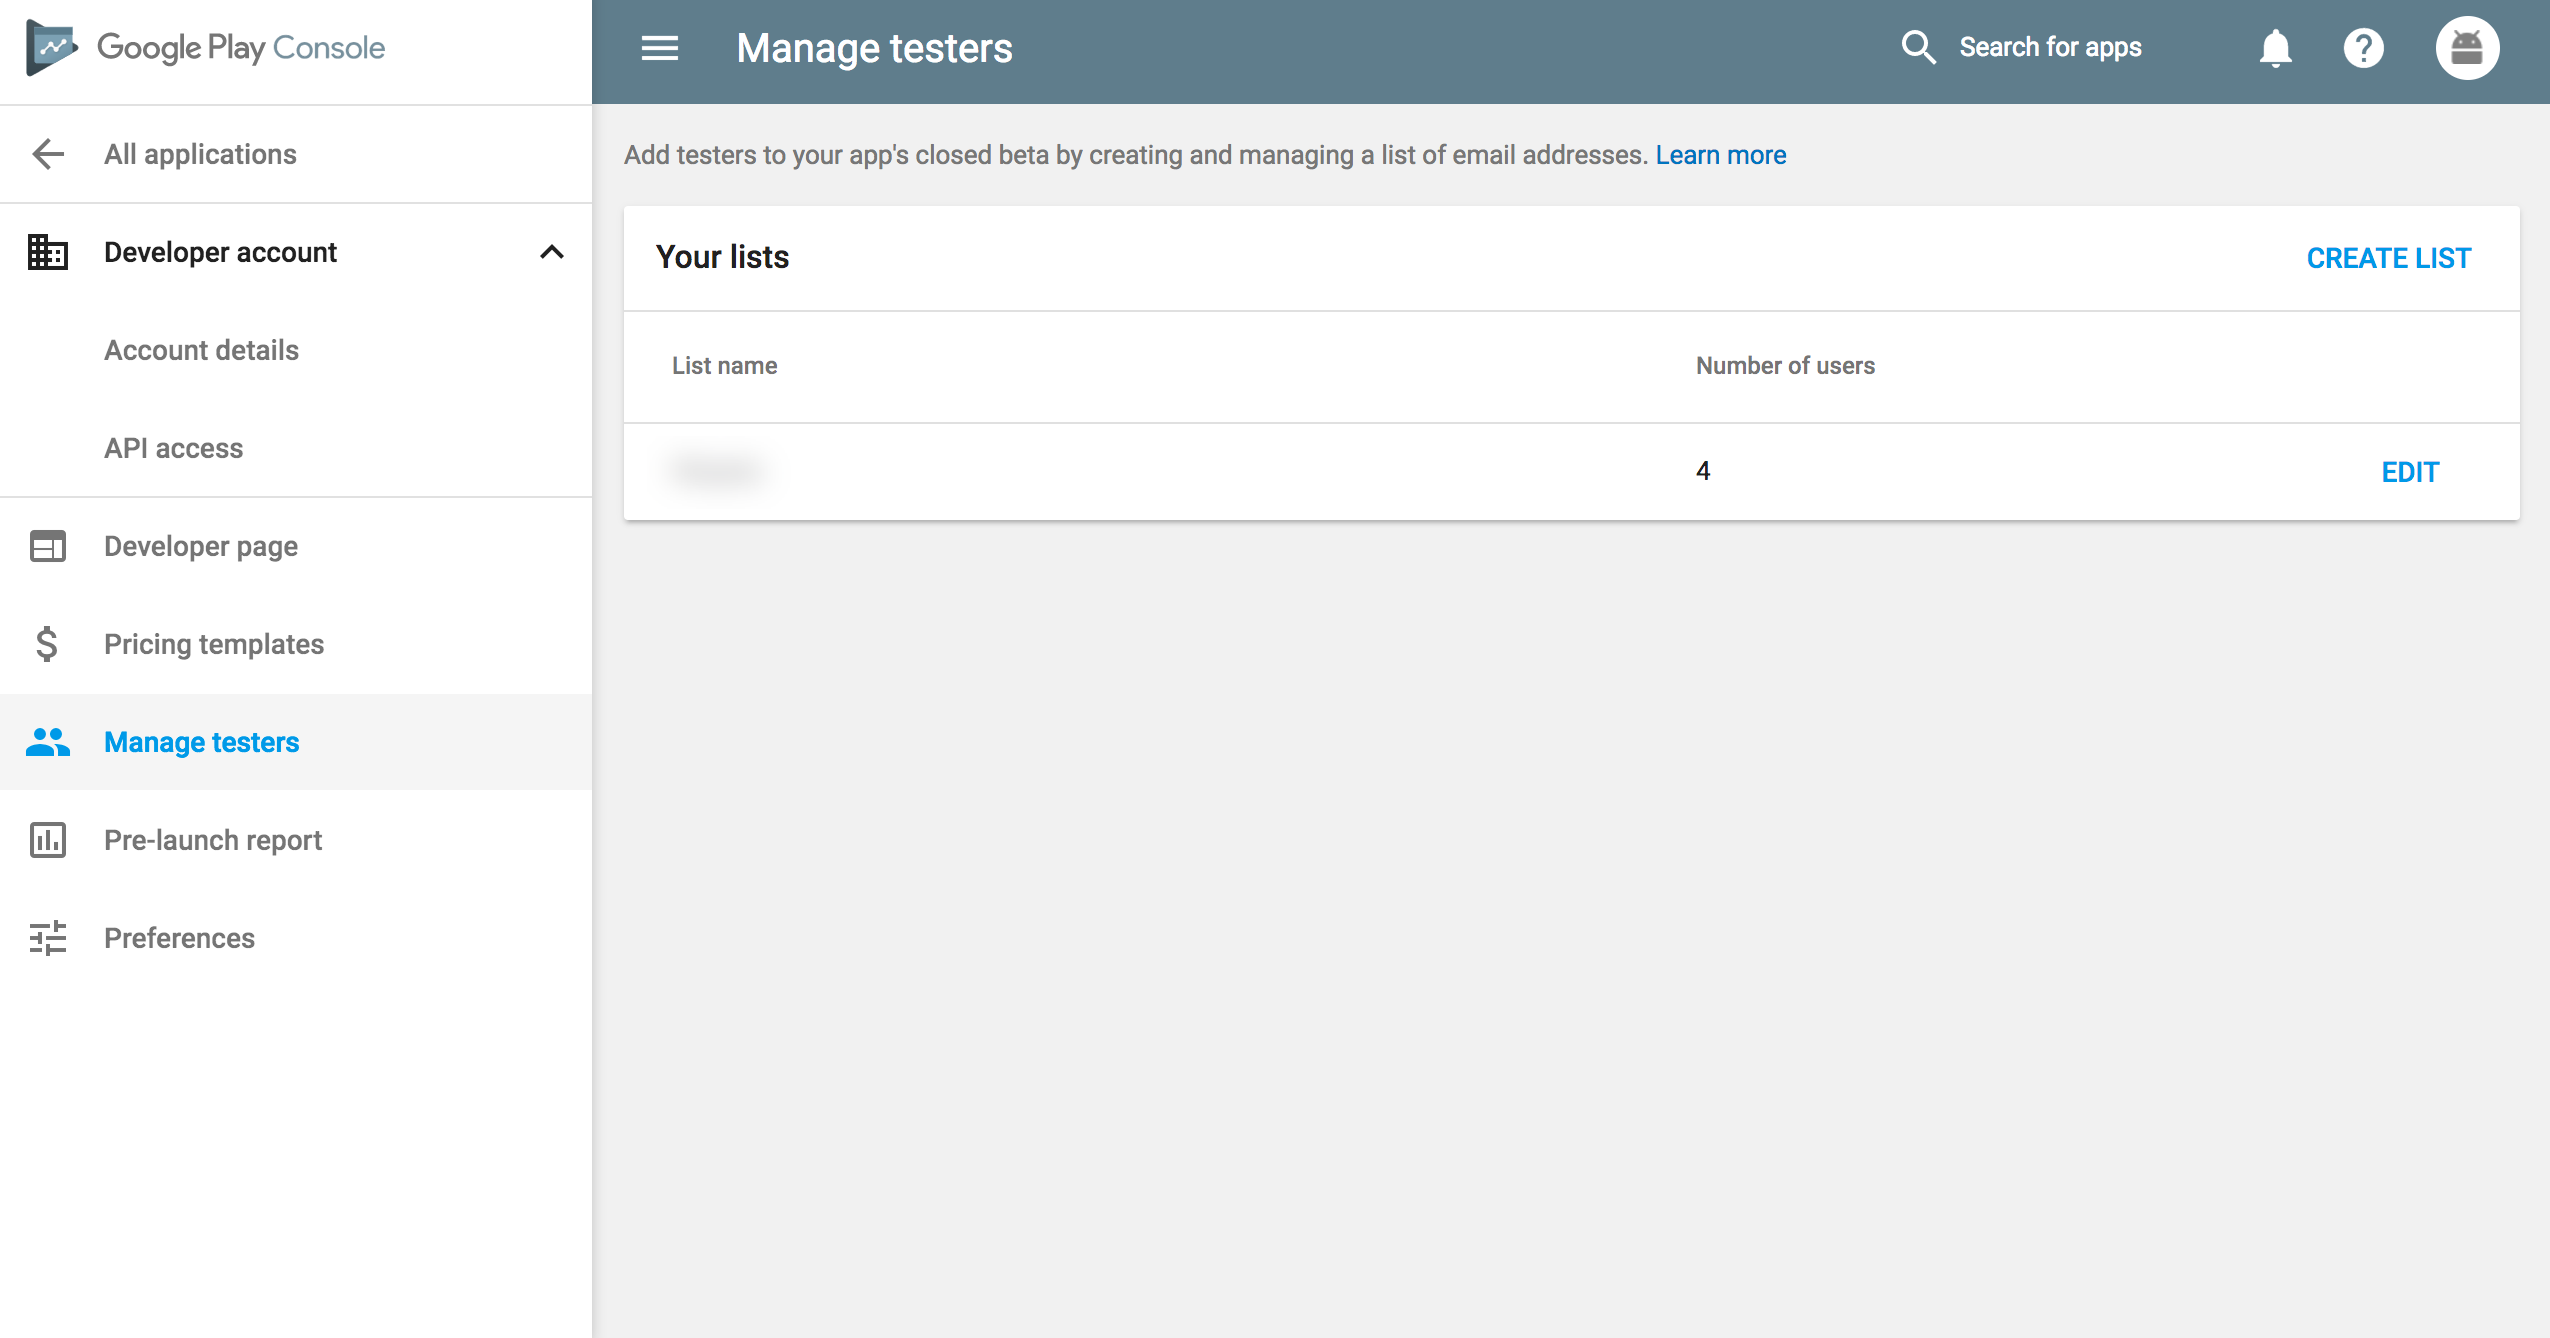
Any user on this list will receive an invitation to test your application. Before being able to download it (assuming it is published), log in to your Gmail account that is listed in the Beta tester list and go to the following link :
https://play.google.com/apps/testing/{your.package.name}
where {your.package.name} must be replaced by your application’s package name. Accept the invitation. You should now be able to download the application from the PlayStore once validated by Google. You will then be able to process your purchases.
Distinguish Test purchases between Real purchases
As soon as your application is available via the store, you can try to purchase your product. Be careful, though, as you are using Real purchases!
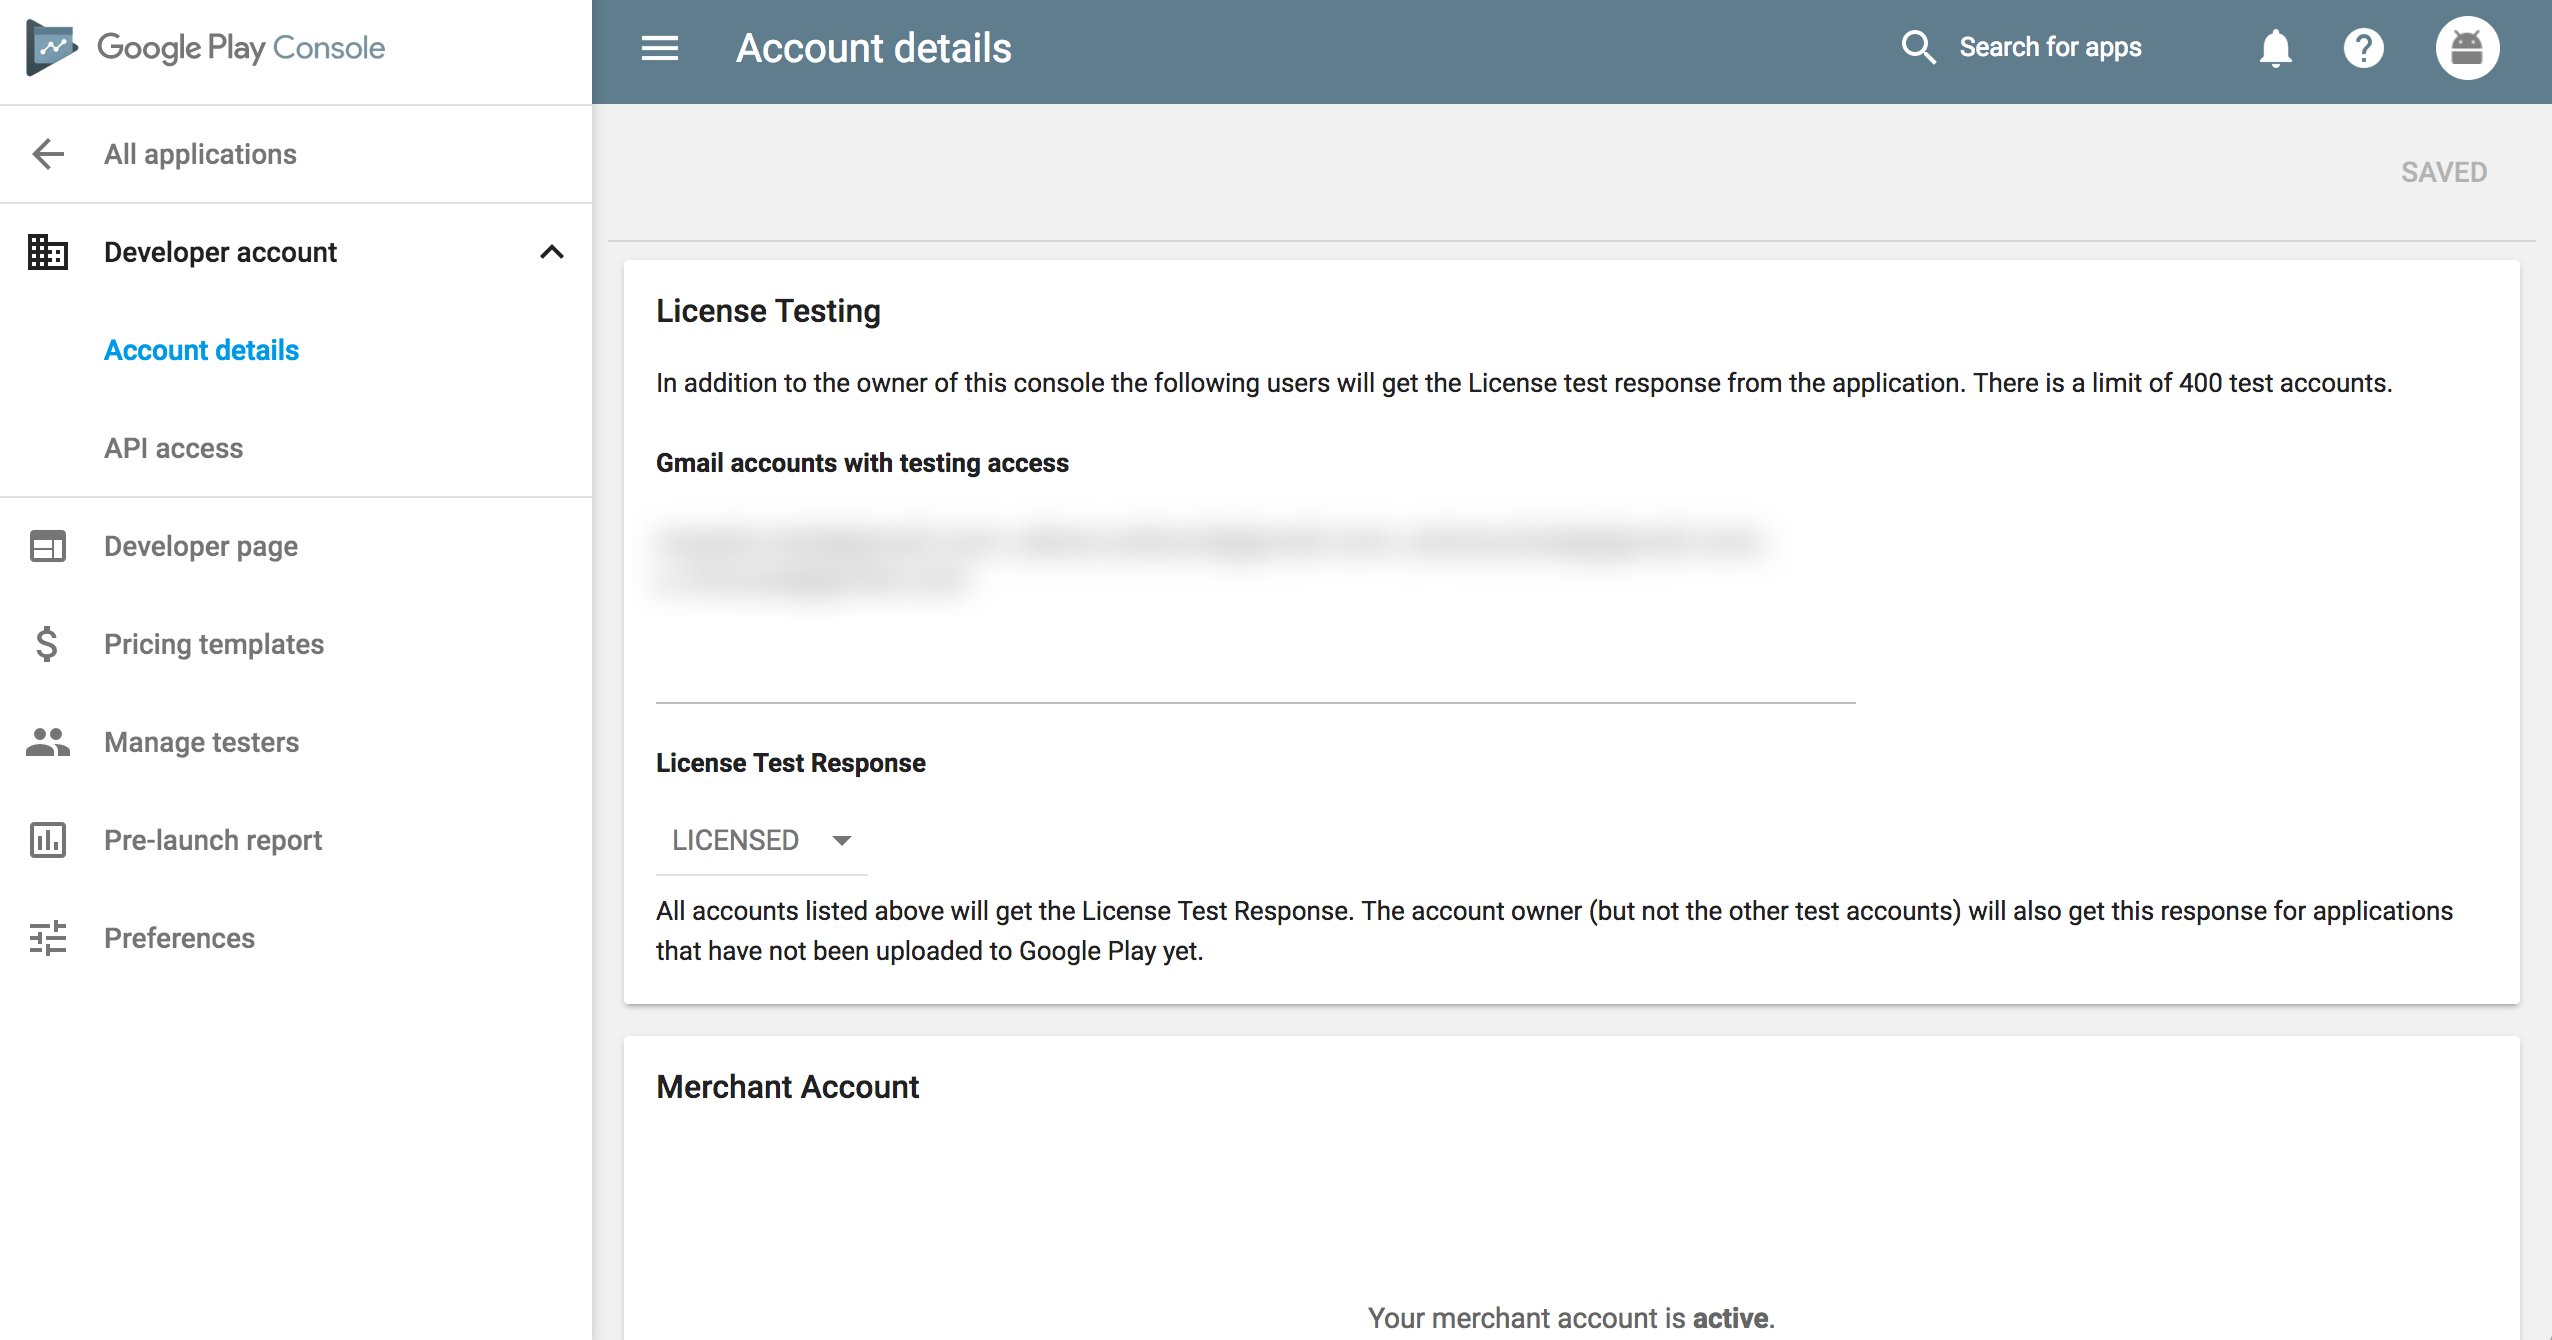
You can bypass the payment process by adding your email address in the License testing list.
Do not confuse the License testing list with the Beta tester list. Although it looks similar, they are not located at the same place and have a different purpose :
-
Beta tester list allows users to download your Alpha/Beta application submitted on the PlayStore
-
License testing list allows users to process IAP without being charged
Go to Settings > Developer account > Account details
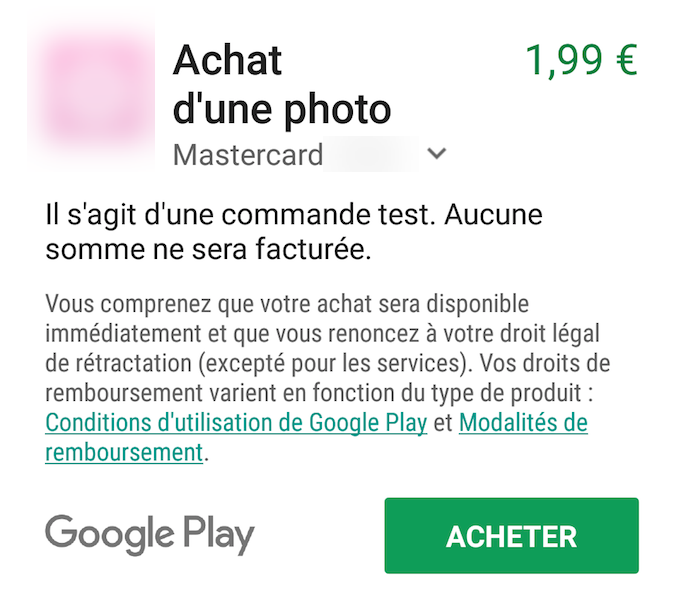
Go back to your application and re-attempt to buy a product. You should now see a “debug” label disclaiming that this is a test purchase.
You are now ready to thoroughly test your IAP flow without having to worry about being charged 🤟.
 Never miss a story, subscribe to my newsletter