Git Flow Made Easy With This Complete Walkthrough
Git Flow has ten years, long live Git Flow!

Git is a powerful versioning tool allowing you to share code with your team. It lets you sandbox your work in a dedicated space called branches. How you manage branches is up to you. What matters is: how do you glue all those branches together when the delivery time comes.
Vincent Driessen presented ten years ago Git Flow. Since then, many developers have adopted it. So massively, that he recently wrote a note in his original post. He thought valuable to urge developers to consider this workflow only if you must deal with several versions in production.
If you fit into that category, I still consider Git Flow to be the most reliable workflow.
So to celebrate its tenth anniversary, I’ll dedicate this article to this workflow. I’ll explain as simply as possible how to respect its philosophy.
The Core Branches
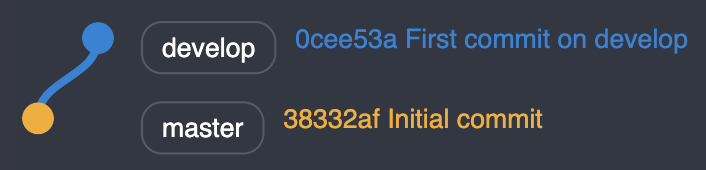
When you create a Git repository, it comes along with a master branch. That’s your most sensitive branch ever. It’s a snapshot of what you deliver in production.
To move forward between two releases, you must create a develop branch. That’s where you’ll pour all your ongoing work. You must never merge directly into master.
So to begin with, create and switch to the develop branch. Let’s commit once for illustration purpose:
1
2
3
$ git checkout -b develop
$ git commit -am "First commit on develop"
$ git push -u origin develop
The -u option while pushing is only required the first time you push your branch to the remote repository.
Brew Your Next Release
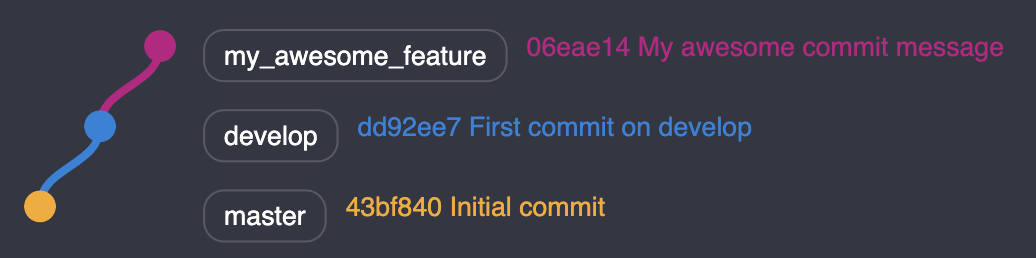
During your project’s lifecycle, you’ll develop features to improve your product. Each time you’ll start one, create a branch prefixed with feature/ from develop.
1
2
$ git checkout develop
$ git checkout -b feature/my_awesome_feature
You’ll want to commit your work and push it to the remote branch.
1
2
$ git commit -am "My awesome commit message"
$ git push -u origin feature/my_awesome_branch
When you’ve finished your feature, create a Pull Request on GitHub targeting develop. Make sure your branch is mergeable. If not, I encourage you to rebase your branch on develop. It’s not as difficult as some people say, simply follow these steps described in “Don’t Fret With Git Rebase”.
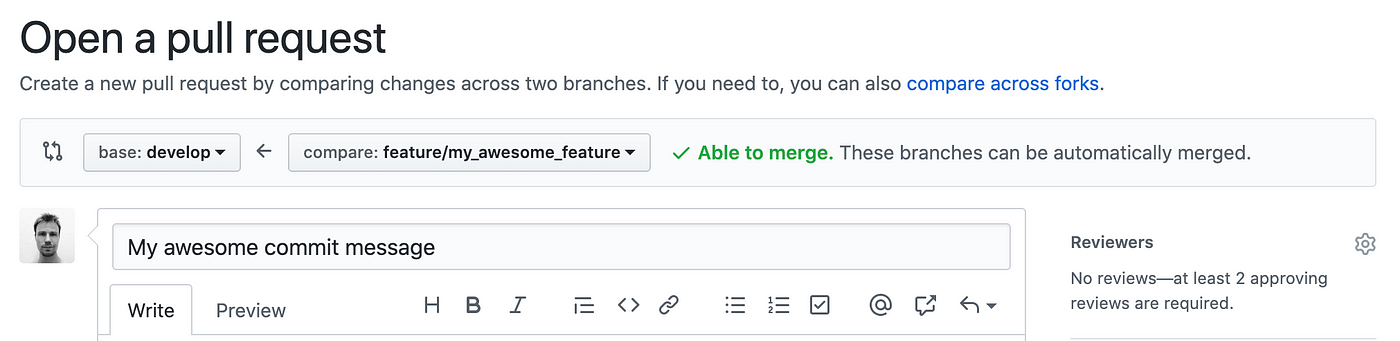
Finally, merge your branch when both your teammates and your CI allows it.
If you don’t use the GitHub interface to merge your branch, you can always do it from the CLI.
1
2
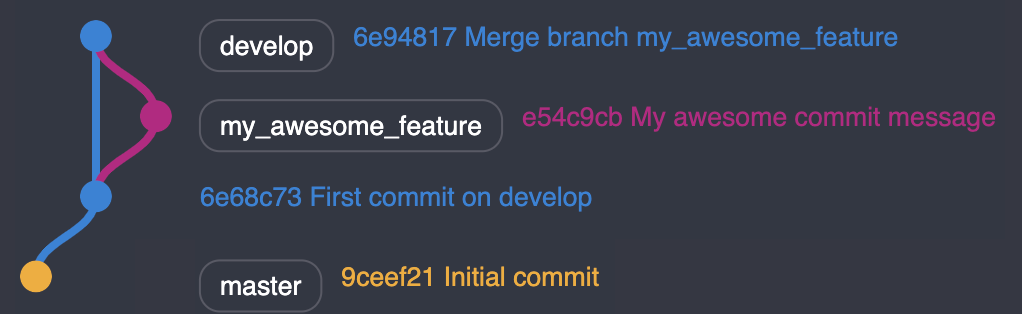
$ git checkout develop
$ git merge --no-ff origin feature/my_awesome_branch
By default, GitHub does a
merge --no-ff. See the documentation for more information.
Update your remote develop branch and do some cleanup
1
2
3
$ git push origin develop
$ git branch -D feature/my_awesome_branch
$ git push -d origin feature/my_awesome_branch
The last line is optional if you’ve merged from a Pull Request as you can delete your remote branch from there.
The official documentation only mentions feature as supporting branch to develop. Yet, we cannot summarize a project’s lifecycle to features. You’ll need to address tasks, fix bugs arising from new features, and so on.
Depending on your organization, you should have a branch naming policy. For instance, you could name them bugfix or task. If you’d like to enforce such a policy, have a look at “How to Prevent Git Commit Naming Mistakes”.
Prepare Your Release
Getting ready to ship a new version? Create a release branch from develop since that’s your most up-to-date branch. Name it with the version name — let’s say 2.0.0.
Prefer naming with the MAJOR.MINOR.PATCH pattern. We’ll see why later.
Here is the branch you’ll create:
1
2
$ git checkout develop
$ git checkout -b release/v2.0.0
Remember to bump your version in your code and commit this change:
1
$ git commit -am "Bump version to 2.0.0"
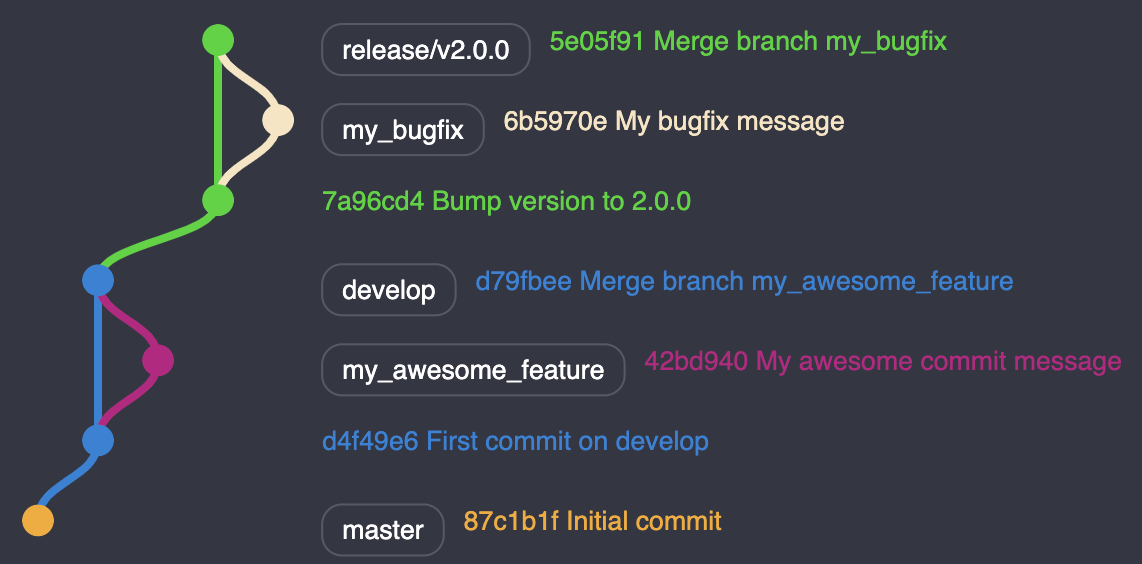
Note that the release branch should only contain bugfix branches. You don’t want to deliver a new feature while you’re about to ship a new version.
With a merged bugfix branch on release, you should have the following tree:
Finish Your Release
As soon as you ship the release to your users, you can merge your release branch into master. Either create a Pull request targeting master or do it on the CLI
1
2
$ git checkout master
$ git merge --no-ff origin release/v2.0.0
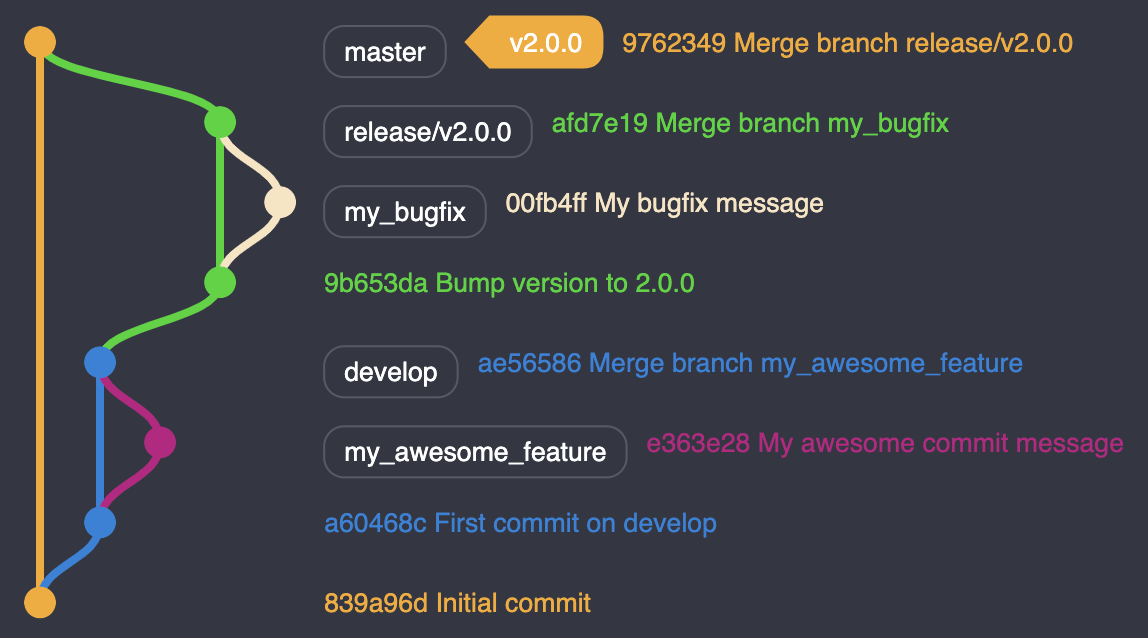
Then mark it with a tag v2.0.0 on master.
1
2
$ git tag v2.0.0
$ git push --tags
Now before deleting your release branch, you must merge all the bugs you’ve fixed into develop. First, merge develop into release to solve your potential conflicts.
1
2
$ git checkout release/v2.0.0
$ git merge --no-ff origin develop
Once your conflicts solved, you can open a Pull Request to merge release into develop.
In the official Git Flow guide, the back merge is directly performed from develop. I’d recommend doing the extra steps above for two reasons:
- You should never push directly to
develop - It’s always beneficial to assess the back merge’s correctness from a Pull Request. You’ll want a set of eyes to prevent mistakes.

Finally, do the cleanup.
1
2
$ git branch -D release/v2.0.0
$ git push -d origin release/v2.0.0
Now that you have deployed your release, you can carry on with your product and get ready with the next release.
Patch Your Release
Let’s face it; your application will suffer from bugs in production. Sometimes, some are too critical to wait for the next release.
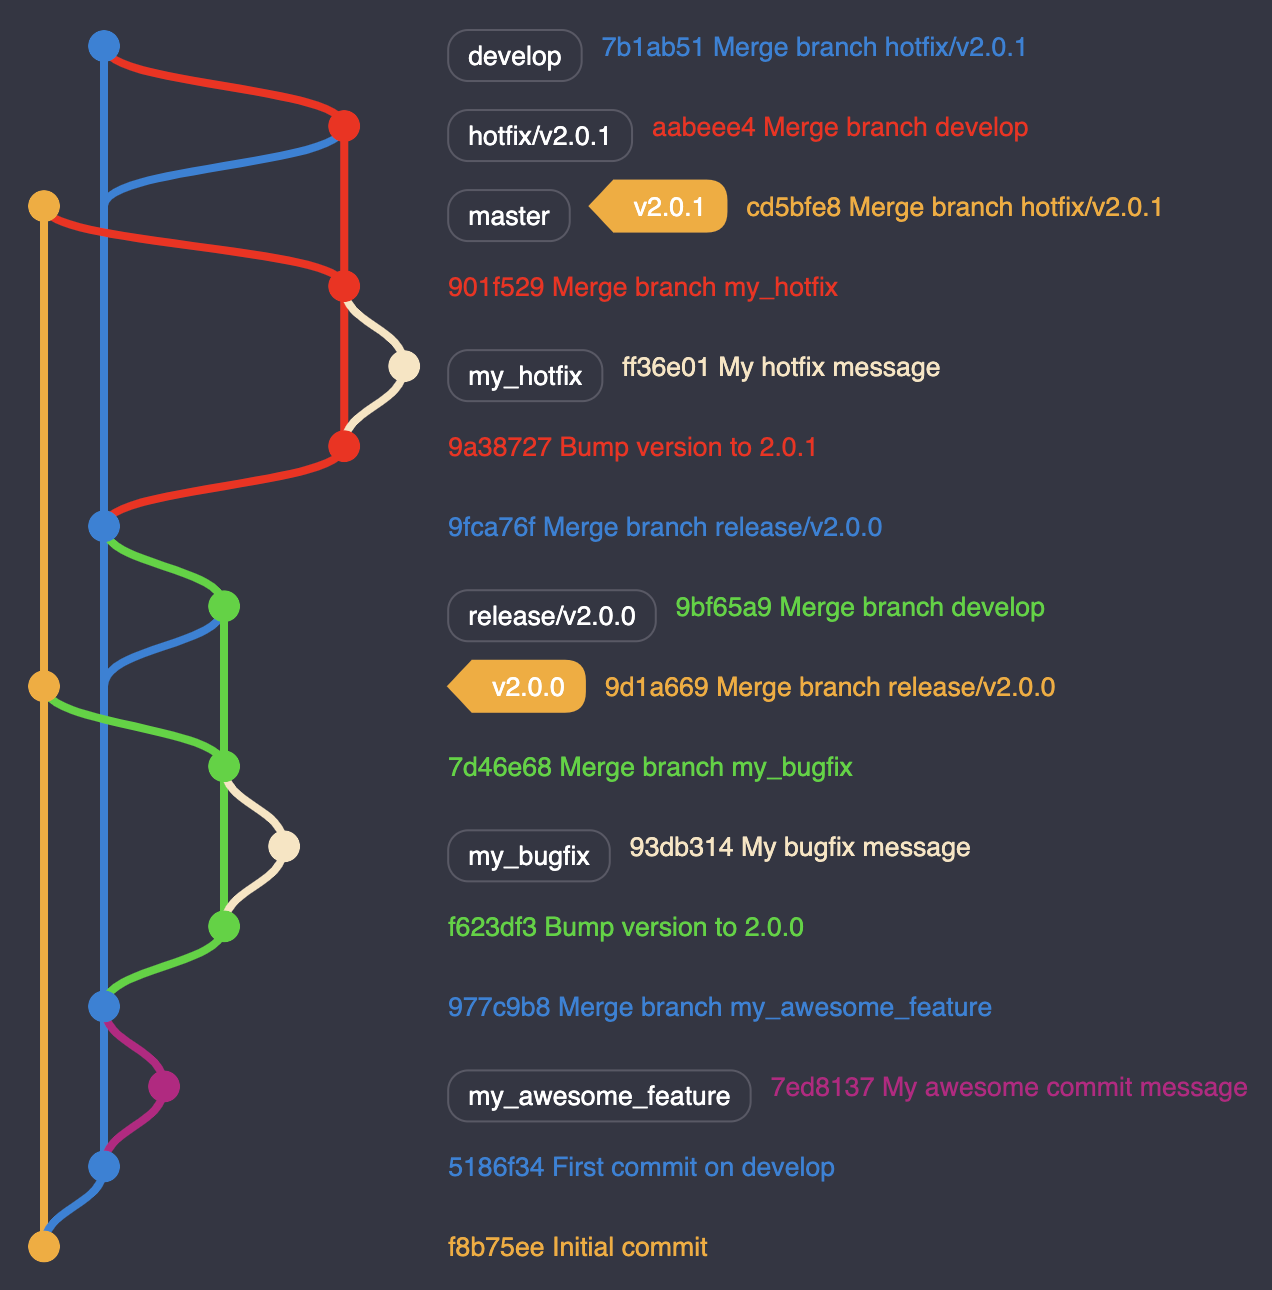
You’ll need to react fast and deliver an unexpected release that fixes the issue. Create a hotfix branch from master. Let’s name it 2.0.1 by using the PATCH number I mentioned above.
After that, you’ll do the same you did for a release branch:
- Merge
hotfixintomaster - Tag your
hotfix - Merge
developintohotfix - Fix potential conflicts on
hotfix - Merge
hotfixintodevelop - Delete
hotfix
With these steps, you have the complete tree you could get:
Thoughts About Git Flow
Git Flow provides a battle-tested workflow. If you follow those principles, you’ll iterate fast without hurdles.
Thanks for reading and happy anniversary to Git Flow!
 Never miss a story, subscribe to my newsletter